Friday, June 29, 2018

Left Facing Seahorse Tutorial


The basic preparation for a left facing seahorse is the same as for one that faces right...but I will go ahead and repeat it here.  This seahorse is based on a .75 inch grid and its finished size is 6 by 13.5 inches. There are three colors: a bit of black/dark for the eye, the background fabric (in this example BLUE) and the seahorse color (in this example pink).


First, cut one piece of black or very dark fabric that is 1.25 by roughly 1.5 to 2 inches for the eye.

Next, we'll cut the main fabric, the blue background and the pink seahorse.

To start, I cut three strips from both the BLUE (background) and PINK fabric. From each fabric, cut a 2.75 inch, a 2 inch and a 1.25 inch strip.

From the 2.75 inch BLUE strip, I cut:

one 2.75 by 5 inch rectangle
one 2.75 inch square
one 2.75 by 2 inch rectangle

From the 2 inch BLUE strip I cut:

two 2 by 3.5 inch rectangle
six 2 inch squares

From the 1.25 inch BLUE strip I cut:
one 1.25 by 9 inch strip
nine 1.25 inch squares (for flip triangles)

plus extra 1.25 lengths of the BLUE that will be sewn then trimmed. At least 18 inches.
(If you want to pre-cut these instead of strip piecing: cut one 1.25 x 3.5 rectangle and a 1.25 x 2.75 in rectangle.)

Next, for the PINK fabric:

From the 2.75 inch PINK strip I cut:

one 2.75 by 6.5 inch rectangle
one 2.75 by 2 inch rectangle

From the 2 inch PINK strip I cut:

one 2 inch square
one 2 by 4.25 inch rectangle

From the 1.25 inch PINK strip, I cut:

two 1.25 by 2.75 inch strips
one 1.25 by 9 inch strips
nine 1.25 in squares
two short lengths somewhere between 1.5 and 2 inches for the eyes.

plus extra 1.25 lengths of the PINK that will be sewn then trimmed.
(If you would like to pre-cut this, cut one 1.25 by 4.5 in. strip, one 1.25 by 2 in. strip, one 1.25 by 2.75 in. strip and 1.25 by 3.5 in. strip. These are for the tail and back of the head.)


Let's start with the eye:


Sew the 1.25 by 2 inch (or so) length of black inside the 1.25 by 2 inch (or so) lengths of purple. Trim across the three strips so they are 1.25 inch long. You end up with a rectangle that is 1.25 by 2.75.

This is the same step as the right facing seahorse so I used the same photo...and that's why the fabric is different. So just for this step, pretend purple is pink.

Next, we have to construct the seahorse building blocks. Because we are changing the seahorse direction, the flip triangles are sewn to different corners as shown in the diagram.


The next step is much easier than it looks. I have laid it out to correspond with the seahorse (kind of) so you can see how it will go together. But really you are making the basic building blocks of the seahorse.

A: Sew the 1.25 by 9 inch pink strip to the 1.25 by 9 inch blue strip. After its sewn and ironed, cut the paired strip into two 3.5 inch lengths and one 1.25 inch length.

B: Sew a 1.25 inch pink flip triangle to three 2 by 2 inch squares of blue. (As a reminder, a flip triangle is a square that is sewn along the diagonal in the corner of another square. The inner part of the purple square is ironed over the sewn line to make a triangle. The bottom two layers are trimmed away leaving a quarter inch seam.)

C: Sew a 1.25 inch blue flip triangle to one of the 1.25 by 2.75 inch strips. See diagram for direction. This is the seahorse's back fin.

D: Sew three 1.25 inch pink flip triangles to the 2 by 2.75 inch blue square. This is the section just under the seahorse's back fin.

E: Sew three 1.25 inch blue flip triangles to a 2 by 2 inch pink square. This is the ear or whatever that is on the top of the seahorse's head.

F: Sew a 2 inch blue square onto the 2 by 2.75 inch pink square. See diagram for the direction. This is the seahorse's forehead.

G: Sew a 1.25 inch blue flip triangle to the bottom left corner of the 2 by 4.25 inch pink square. Then sew a 2 inch blue flip triangle to the top right corner. See diagram for the direction. This is the seahorse cheek and nose.

H: Sew a 2 inch blue square to the top right corner of the large 2.75 by 6.5 pink rectangle. Next sew the 2.75 inch blue square to the bottom right corner. See the diagram for the direction. This is the seahorse's belly.

At this point, all the flip triangles are ironed and trimmed.

Next, we will sew some of the building blocks together so we can see the seahorse take shape.


1.  Sew the eye piece to the bottom of seahorse forehead (F).

2. Sew the ear piece (E) to the top of one of the long pink/blue strip sets.

3. Sew the short pink/blue strip set to B3 (as shown in the diagram). This is the tip of the nose.

4. Sew C to its pink strip companion to make the back fin.

5. Sew D to the top of the second long pink/blue strip set to form the bottom of the back fin and the top of the tail.

Next, let's build the seahorse face.

The forehead and eye component is going to be the center where we build all around it starting with a partial seam.

Take the seahorse cheek (G) and partially sew it to the bottom of the eye as shown in the diagram. Next take a 1.25 inch strip of pink, and sew it the full length from the top of the forehead to below the cheek.

 Cut away the excess pink strip, trimming it to align with the seahorse cheek.

Next, sew a 1.25 inch blue strip across the top of the seahorse's head.

First, trim the blue strip that was sewn to the top of the component. Next, sew a 2 by 3.5 inch blue rectangle to the left side of the component (also known as the seahorse forehead).

Then finish up by completing the partial seam, sewing the seahorse cheek component to the blue rectangle.

Now its time to tackle the tail.  This will follow a basic log cabin construction built around one of the 2 inch blue squares with a single pink flip triangle (B2).

1. First sew the pink strip to the left side of of the B2 square. Trim.

2. Next, sew the pink strip to the top side of the B2 square. Trim.

3. Next, sew two 1.25 inch blue square flip triangles to the top corners. Iron back and trim.

4. Sew a blue strip to the right side and trim.

1. Sew a 1.25 inch pink square as a flip triangle to the bottom right corner.

2. Sew a pink strip along the bottom and trim.

3. Sew two 1.25 inch blue squares as flip triangles to the bottom corners.  Iron back the flip triangles and trim the excess in the back.

Your seahorse tail should look like this.


Now, lay out the pieces as shown. In this example, the top of the back fin has been sewn to the bottom fin/top of tail.

1. Sew the back ear piece to the seahorse head.

2. Sew the nose piece to a 2.75 by 5 inch blue rectangle.

3.  Sew the last B square to the bottom back tail.

4.  Sew a 2 by 3.5 inch blue rectangle to the left side of the tail.


 1. Sew the head pieces together.

2. Sew the center front blue piece to the seahorse belly.


1. Sew the belly section to the tail.


1. Sew the back lower section of the seahorse to the front lower section.

2. Sew the head to the body.


And now you have a left facing seahorse!

Thursday, June 28, 2018

Another section

One more panel. This one is next to the center panel, top right side.

And here is a close up.

Wednesday, June 27, 2018

3-D

Today I made a furry quilt in three-dimensions. Okay, it's really the cat tree that has sat in its box by the front door for a very long time.

Molly quickly figured out that she could use it as a gateway to the top of the bookshelves. She also found it to be an excellent platform for her piggy-back rides. Given the platforms and hidey-holes are relatively small, I suspect it will also be a Buddy-free zone. I will be securing it to the wall in case he tries, though.

The instructions say to not let the cats use it unattended. I read the instructions to Molly and I'm sure she will comply.

Monday, June 25, 2018

Another demented stage

Today I spent more time on the demented quilt and less on cleaning up the sewing room. We did have a huge management reorganization, however. Emboldened by positive remarks about her contribution to this blog, Molly is now the editor-in-chief for this blog and responsible for its content. Today we had our first editorial board meeting. I said this seems more like a cuddle, and Molly said, "Just a little more under the chin, please."

Despite the reorganization, I did get all the strip sets sewn and pressed. Since Molly was promoted, Buddy is now in charge of supervision. Unfortunately, he loves to be held and that informs his supervisory style. I did explain to him that I can't see past his massive head and my crushed spine is quite painful.

Next, I completed the section on the left. Either I made it too long, or I still have to add some to the right side.

Buddy is just the type of supervisor you might expect. This is him sleeping behind the design wall. The rest of the time he did the usual dog routine of asking every five minutes "Whatcha doing? Can I help? Is it time to eat? Is it time to play? Whatcha doing?"

And Molly stopped by to remind me that only her best poses can be included in this blog.

Sunday, June 24, 2018

More Dementor Parts

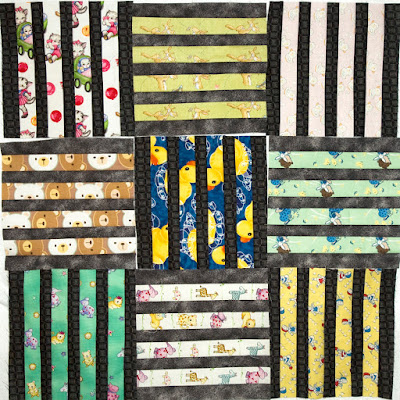
I made more strip sets to make sure I had plenty for finishing the dementor quilt. Here are all the two inch slices from those strip sets.

Based on the Buddy measurement system, the pile is one pony high.

Saturday, June 23, 2018

Teal Pinwheels

Here are some teal pinwheels. If you would like a hearty feast of teal, please visit the Rainbow Scrappy Challenge.

I spent most of the day cleaning up the sewing room. This was the overflow...oops.

Here's Molly communing with her new best friend. Here art sculpture is on the other end.

And yes, like a typical dog, Buddy got a hold of Molly's new best friend and sculpture, and mangled it.

Thursday, June 21, 2018

Summer Camp

I started a new quilt... The blocks are 8 inches finished.

I had planned to teach myself crochet, but Molly developed a keen interest in abstract yarn sculpture.

Wednesday, June 20, 2018

New panel

I made the center panel for the demented/dementor/garden mosaic quilt. And now I'm working on the panels that surround the center. There are twelve of them. I found myself running out of bat wings so I cut new strips and made new strip sets. 

Sunday, June 17, 2018

Dementor Denied

I got the bin out with the dementor/bat wing/garden mosaic project. But access was denied.

I think I had the right password, its just the security system was a bit sun drunk.

Friday, June 15, 2018

Chameleon Background

I was making more chameleons and am having second thoughts about the background I chose. It looks to muddy to me now.  If I go lighter for the background, the chameleons will pop out more. The top fabric is almost all white with hints of blue. It's my favorite, but I don't have much of it. The middle fabric has a range of light pastels on white and is printed with dragonflies so the chameleons won't go hungry. 

Thursday, June 14, 2018

Stash Enhancement Warning

Another quilt guild meeting and another handful of wonderfully weird prints for the spool collection. There were two teal and pink fabrics, one dark and one light. Took me back to the 90s. In addition, there was a bit of beige fabric with purple roses and a graphic black and white celebrating the centennial.  I also took advantage of two online sales and an IRL sale of batiks.

(where IRL = in real life)

Here is a selection of lights with some bright pink cats as balance.

And now that I live in Portland, I try my hardest to avoid Fabric Depot. Except that they are having a sale on batiks...and I am looking for chameleons...

Tuesday, June 12, 2018

I-Spy Back is Back

Here is the I-spy quilt back after a bit of rearranging and a lot of sewing. I even added some new blocks because I couldn't stop myself.

Here are Molly and Buddy looking sweet. Quite an illusion. Molly has a new hobby where she climbs the clothes in the closet to get to the shelf above the hanger bar. I have been closing the closet to prevent this, but I apparently left the door slightly ajar. I heard crashing. She had knocked items off the top shelf down to the floor and trapped herself inside. Before I let her out, I reminded her that there are no vet visits for monkey hobbies or ingesting plastic and other stupid stuff. Happily, she is quite young and still has at least a couple of cat lives left.

Sunday, June 10, 2018

I-spy returns


I am making a reversible I-spy quilt. I pinned the top of the quilt to the batting, and quilted in the ditch down and across the blocks. This made a grid on the batting. I will use this as a guide for basting the I-spy back to the top layers.

So now I have to finish sewing together the blocks for the back of the quilt.

Saturday, June 9, 2018

Teal Postage

Here is my teal postage stamp block...but not soon enough for Angela to send us all postcards from her wonderful trip. Make sure you visit the Rainbow Scrappy Challenge to welcome her back.

And given we are half way through our year (YIKES!), I've assembled all of the postage blocks I've made so far.

Friday, June 8, 2018

I-spy front layering

It's a lot easier to layer a quilt when all one is doing is attaching the quilt top to the batting. In particular, I didn't have to worry about the batting going one way and the backing going another. Well, except for when Molly started pulling the batting down to the floor. Molly is a cat of many passions...clearing the design wall, pulling apart a layered quilt and climbing to the highest place in the room.


Thursday, June 7, 2018

Center Medallion

Here's the center medallion for the Garden Mosaic/Dementor/Bat Wing Quilt. I made four panels and put the single layer of sashing through the middle to have the diamond come out. And now I can take it off the design wall. Poor Molly has been going nuts with both the I-spy and this quilt laid out. She does like to keep her design wall clear.

Tuesday, June 5, 2018

Defanged Dementor

This is a bit weird and technical. In making this quilt using bat wings instead of half-square triangles, leaves a gap at the intersection. This is solved by a sashing that alternates a goose and a two-patch. In my case, I made four patches and then stuck flip triangles on two sides. And yes, I just noticed that the two-patch on the right end should be two light patches, not two dark patches.

Monday, June 4, 2018

I-Spy Front Quilt Top

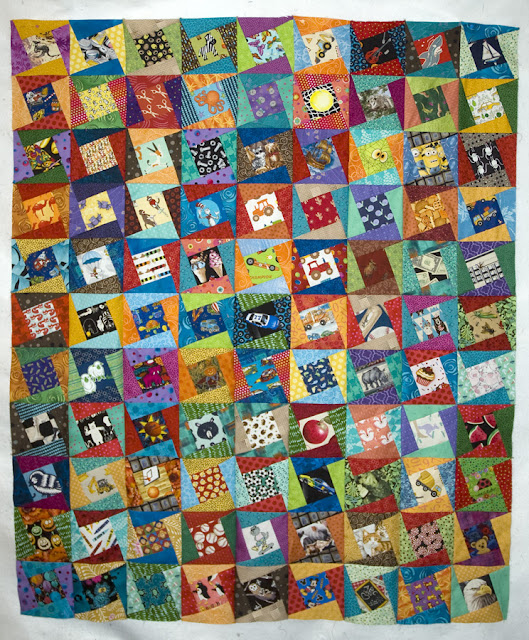
Here's the front quilt top complete with my nephew's name and age when he gets the quilt. He may still be 3, but is still at an age where the preference is to round up rather than down. Before I put the four hunks together, I did pull a block out and replace it. There was an annoying column of yellow and gold that directed my eyes to it. But otherwise, I didn't get too fussy about block placement.

And here's Buddy reminiscing about his morning's glory when he and Molly conquered a large pile of teal scraps. I think this is the origin for the term scrap busting.