Today I thought I would finish the speedy chicken tutorial by showing the right facing chicken. I showed how to make the left facing chicken here. The fabric requirements are exactly the same--basically what changes is the direction of the flip triangles.
This chicken is based on a one inch grid, that is you will be using 1.5
inch, 2.5 and 3.5 inch strips.
For the fabric, I used a dark purple fabric for the wing and a lighter purple fabric
for the body. The wattle and comb in this tutorial is red, and the beak
is yellow. And I used a light beige for the background.
Fabric Requirements:
Background
one 2.5 by 4.5 inch rectangle
two 2.5 inch squares
four 1.5 by 2.5 inch rectangles
one 1.5 by 4.5 inch rectangle
three 1.5 inch squares
Yellow beak
one 1.5 inch square
Red Wattle and Comb
four 1.5 inch squares
Light Purple (Body)
one 3.5 inch square
one 2.5 by 4.5 inch rectangle
two 2.5 inch square
three 1.5 inch squares
Dark Purple Wing/Tail
one 4.5 by 5.5 inch rectangle
one 1.5 inch square
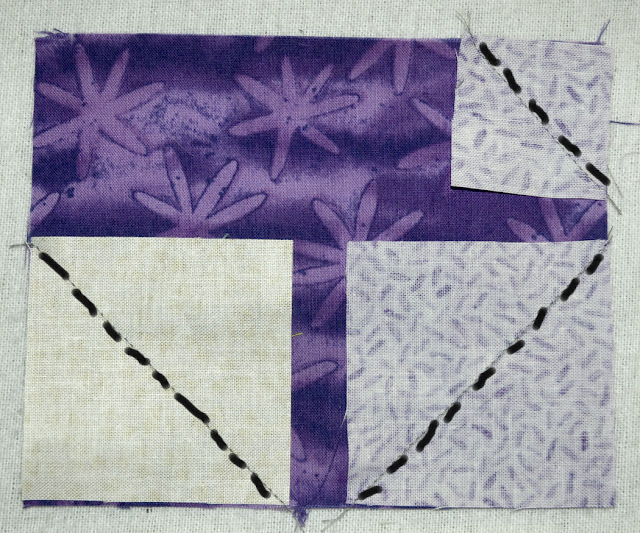
I make the wing first. This uses a 2.5 inch beige square in the lower right corner and a 2.5 inch light purple square in the lower right corner. There is also a 1.5 inch light purple square in the upper right corner. By making the wing first, I can use the trimmed triangles to cut partial 1.5 inch squares for other parts of the chicken.
Here you can see the chicken parts laid out to sew the flip triangles. The flip triangles for the back and tail are taken from the wing's waste triangles. Sew as indicated by the broken lines.
Here is the chicken after sewing and ironing all of the flip triangles.
Next, sew the components as indicated by the arrows: The tail to the back, a comb to the 1.5 inch light purple square, two combs together, and the beak to the 1.5 inch beige square.
Oh egads. I forgot to mention that you should shut the barn door before you begin. And who tied together the hind legs of that poor sheep? Not only that, she has a big square gash in her cheek. I am, however, intrigued with the potential for sheep-dyed yarn.
Let's get back to the purple chicken. This is how she looks after the last sewing steps. Now sew the beak to the face, sew the two comb piece to the 2.5 inch beige square, and sew the single comb piece to the chicken's back.
And finally, we're to the last four steps. First sew the two comb component to the top of the chicken's head. Second, sew the chicken breast under the chicken's head. Third, sew the chicken's back to its wing. And last, sew the front of the chicken to the back.
SQUIRREL!
Hopefully, without further distractions, you have made a right-facing chicken. And in case you were wondering, this blog post was carefully supervised by Buddy.
Yesterday, I layered a quilt without Molly's supervision. She was less concerned with flaws in the pig quilt, but was very concerned with flaws in the quilter. So much of the day I have received extensive pet therapy. It looks and feels a lot like having a cat sleep in your arms, but I'm sure this just reflects my ignorance.


5 comments:
OMG! SQUIRREL!!!! I love squirrels (probably because I don't have to deal with them in my garden!) How cute they would be in an autumn quilt with leaves and more acorns..... Love that sheep, too. And the chicken. But mostly I love Molly (please tell her that so I don't get in trouble here).
I was starting to wonder if Buddy was stepping up to help, or if he was just sloughing off all the work onto his sister...
(OMG SHEEP!!! Baaaah!!!!!) (I miss my sheep so much!) (Baaaah!)
Oh, Sally, sheep and squirrels? What's next and where do you find the time?
Are we going to be seeing a sheep quilt this year? I think she's great!!
Thanks for the R facing tutorial! I see both liberal and conservative chickens in my future barnyard. Oh, the sheep is too darned cute and squirrels? Yikes!
Post a Comment